
This post contains affiliate links. As an Amazon Associate, I earn from qualifying purchases. This comes at no extra cost to you.
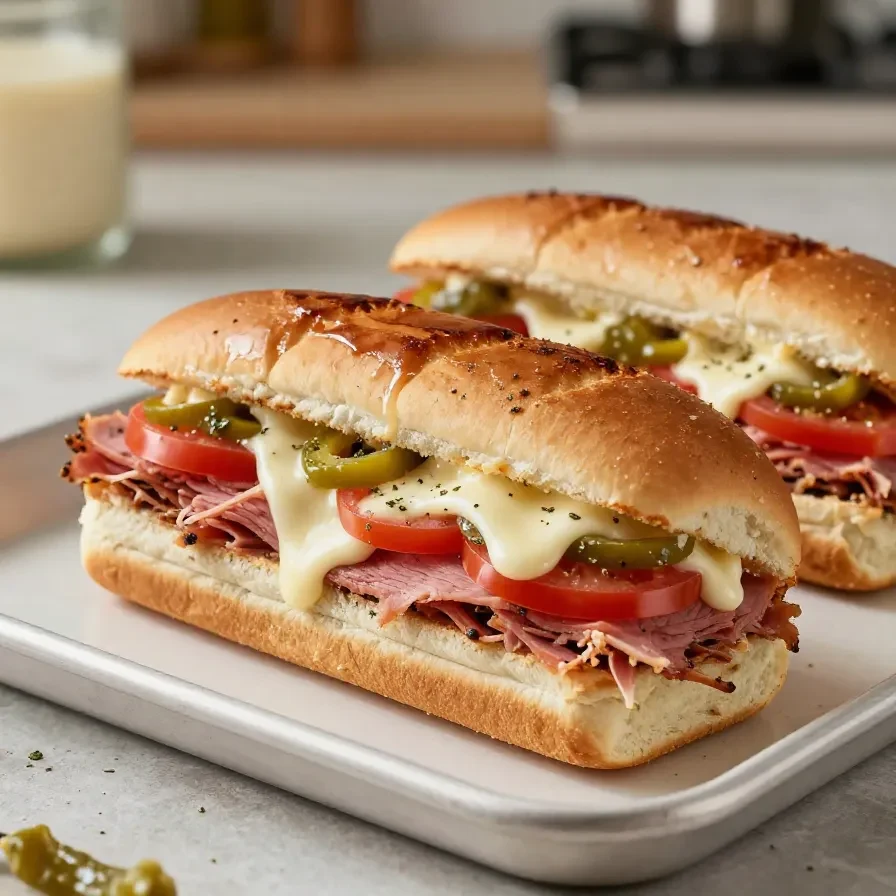
Simple dinner for hot days is Hot Italian Sub Sliders baked with slider buns, ham, salami, pepperoni, provolone, and a garlic-herb butter topping. This recipe takes 15 minutes to prep and about 25 minutes to bake, and it makes 12 warm sliders for parties, game day, or an easy weeknight dinner.
I am Eric Bruno, a certified Fitness Coach in New York City, and I rely on practical, portion-aware recipes like this when I need easy meal for guests that still feels structured and satisfying.
The baked rolls turn crisp on top while the cheese melts into the meats below, and the butter mixture brings garlic, Dijon, Parmesan, and Italian seasoning into every bite. Hot Italian Sub Sliders work well when you want a hot, hearty option without spending long at the stove.
I tested this style for a busy kickoff window, and the 12-slider pan held heat well for a short serving break while the foil stayed on.
Table of Contents
- Why do Hot Italian Sub Sliders work so well for parties?
- What ingredients do you need for Hot Italian Sub Sliders?
- How do you make Hot Italian Sub Sliders step by step?
- Frequently Asked Questions About Hot Italian Sub Sliders
- What should you serve with Hot Italian Sub Sliders?
- What mistakes should you avoid with these sliders?
- What simple swaps work in Hot Italian Sub Sliders?
- How do you store and reheat Hot Italian Sub Sliders?
Why do Hot Italian Sub Sliders work so well for parties?
Hot Italian Sub Sliders solve the problem of feeding a group with one 9×13-inch pan, 12 servings, and a 25-minute bake time. They bring together familiar deli meats, melted provolone, and a savory butter topping, so you get a hot party snack that is easy to portion, carry, and serve.
- They fit a crowd without extra pans. One batch makes 12 sliders, which keeps serving simple for game day or lunch ideas for groups. The pan format also helps the cheese stay contained instead of sliding off individual sandwiches.
- They hold up better than cold party snacks. The 15-minute covered bake melts the cheese and warms the meat through, then the uncovered finish gives the tops a little color. That means you can serve them warm instead of relying on party snacks cold.
- They pair easily with lighter sides. A tray of these sliders works beside crunchy vegetables, fruit, or a simple salad, which helps build a balanced adult game day spread. I use that approach when I want hearty snack ideas without making the table feel heavy.
- They are practical for timing. The sliders rest for just 2 to 3 minutes before slicing, so they stay together better on the platter. That short rest also helps you keep the cheese from running too fast.
Hot Italian Sub Sliders also answer the need for easy meal for guests because they feel substantial without requiring a long ingredient list. The flavor profile works especially well for Italian night ideas when you want something warm and efficient.
What ingredients do you need for Hot Italian Sub Sliders?
Hot Italian Sub Sliders use 12 slider buns, three deli meats, provolone cheese, and a garlic-herb butter mixture for the top. The ingredient list stays straightforward, and every item has a job: the rolls hold the filling, the meats bring salt and texture, and the butter mixture adds moisture and flavor.
- 12 slider buns or Hawaiian rolls, split in half horizontally
- 12 slices deli ham
- 12 slices salami
- 12 slices pepperoni
- 12 slices provolone cheese
- 1/2 cup unsalted butter, melted
- 1 tablespoon olive oil
- 2 cloves garlic, minced
- 1 teaspoon Italian seasoning
- 1 tablespoon grated Parmesan cheese
- 1 teaspoon dried parsley
- 1/2 teaspoon red pepper flakes, optional
- 1 tablespoon Dijon mustard
- 1 tablespoon mayonnaise
- 1/2 teaspoon garlic powder
- 1/4 teaspoon salt
- 1/4 teaspoon black pepper
The butter, olive oil, garlic, Dijon mustard, and mayonnaise matter most for the finish because they create the savory topping that soaks into the buns. I measured that mixture carefully when testing the pan, and the balance kept the tops flavorful without making them greasy.
How do you make Hot Italian Sub Sliders step by step?
The method is simple: prep the pan, mix the topping, layer the rolls with meats and cheese, then bake covered and uncovered until the tops are golden. The full process uses a 350°F oven, 15 minutes covered, and 5 to 8 minutes uncovered for a total cook time of about 25 minutes.
Step 1 — Prep the baking dish
Preheat the oven to 350°F (175°C). Lightly grease a 9×13-inch baking dish or line it with parchment paper so the sliders lift out cleanly after baking.
Step 2 — Mix the butter topping
In a small bowl, whisk together the melted butter, olive oil, minced garlic, Italian seasoning, Parmesan, parsley, red pepper flakes if using, Dijon mustard, mayonnaise, garlic powder, salt, and black pepper. This mixture should look smooth and well combined so it spreads evenly across the tops.
Step 3 — Set the bottom rolls in place
Place the bottom halves of the slider buns in the prepared baking dish. Keep them in a tight layer so the finished Hot Italian Sub Sliders bake evenly and stay easy to slice.
You might also enjoy our italian grinder sliders.
Step 4 — Build the layers
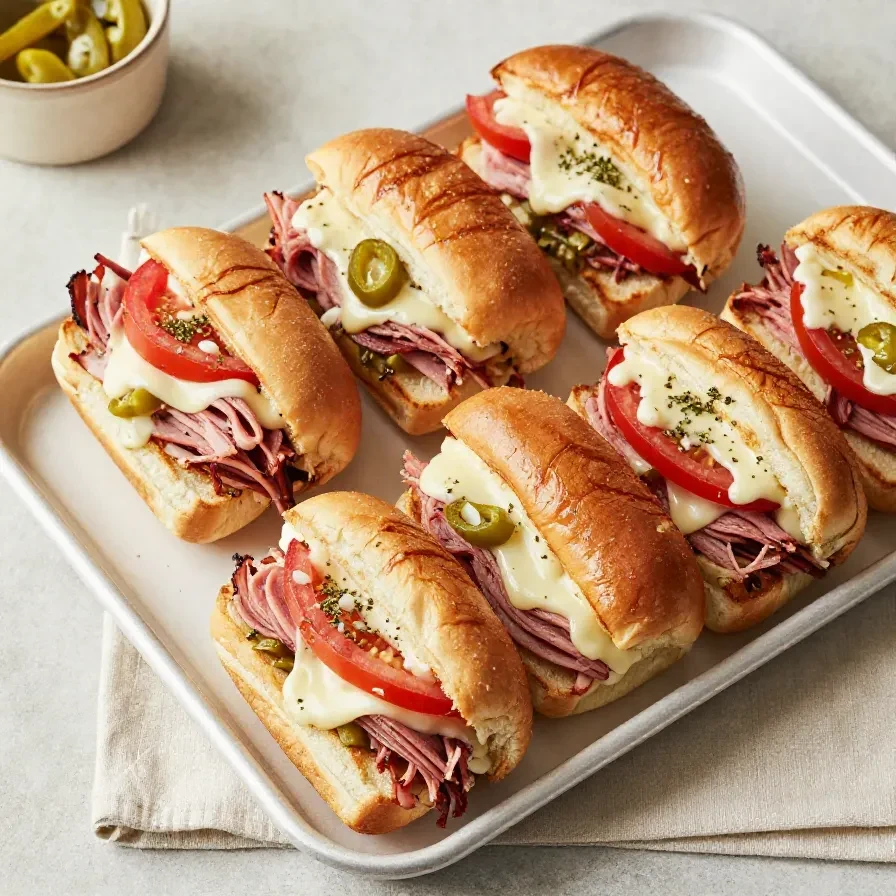
Layer each bun with ham, salami, pepperoni, and provolone cheese, dividing the ingredients evenly among the sliders. Even layering matters here because it gives each slider the same balance of meat and cheese.
Step 5 — Add the tops and butter mixture
Place the top halves of the buns over the fillings. Brush or drizzle the butter mixture evenly over the tops of the sliders, making sure to cover each one.


Step 6 — Bake until hot and golden
Cover the dish with foil and bake for 15 minutes. Remove the foil and bake for 5 to 8 minutes more, until the tops are golden and the cheese is melted.
Step 7 — Rest, slice, and serve
Let the sliders cool for 2 to 3 minutes, then slice and serve warm. That short rest helps the cheese settle so the Hot Italian Sub Sliders hold together on the plate.
Frequently Asked Questions About Hot Italian Sub Sliders
Can I make Hot Italian Sub Sliders ahead of time?
Yes, you can assemble Hot Italian Sub Sliders ahead of time and bake them later. Keep the assembled pan covered in the refrigerator, then add the butter topping right before baking so the buns do not get soggy.
For more ideas, check out our easy cheeseburger sliders recipe.
How do I keep the sliders warm for serving?
Keep them covered after baking and serve within a short window. The foil helps hold in heat for 10 to 15 minutes, which works well for game day spreads or staggered guest arrivals.
Can I serve these as lunch ideas for groups?
Yes, Hot Italian Sub Sliders work well as lunch ideas for groups because one pan makes 12 portions. Pair them with simple side choices so the meal feels complete without needing more cooking.
Do I have to use red pepper flakes?
No, the red pepper flakes are optional. Leave them out for a milder version, or keep the 1/2 teaspoon if you want a little heat in the butter topping.
How many sliders should I plan per guest?
Plan on 2 sliders per adult for a lighter spread or 3 for a hungrier group. Since this recipe makes 12 sliders, it comfortably serves 4 to 6 adults when other food is on the table.
What should you serve with Hot Italian Sub Sliders?
Hot Italian Sub Sliders pair best with sides that add crunch, freshness, or a cooler temperature. That balance helps round out a party table, especially when the sliders are the main hot item and you want the rest of the spread to feel easy to manage.
Looking for something similar? Try our french dip sliders.
- Chopped salad. A crisp salad adds contrast to the melted cheese and rich meats. It also helps turn Hot Italian Sub Sliders into a more balanced dinner plate.
- Fresh vegetables and dip. Raw vegetables bring crunch without more baking time, which is useful when the oven is already busy. This is a practical choice for easy no cook finger foods alongside the sliders.
- Fruit platter. Sweet fruit gives a cool bite between hot sliders and salty deli meat. It works especially well for parties where guests want variety.
- Simple chips or roasted potatoes. These add a second texture and make the meal feel more complete. They are useful when you want hearty snack ideas that still stay simple to serve.
What mistakes should you avoid with these sliders?
A few small mistakes can affect the texture of Hot Italian Sub Sliders, especially because the rolls, meat, and cheese all bake together in one dish. Keeping the layers even and the topping balanced gives you better slices and a cleaner serving pan.
- Do not over-saturate the buns. Brush the butter mixture evenly, but do not pool it in one spot. Too much in one area can make the bottom rolls soft instead of sturdy.
- Do not skip the foil cover. The first 15 minutes covered help the cheese melt before the tops brown. If you bake uncovered too early, the rolls can toast before the center heats through.
- Do not slice immediately. The 2 to 3 minute rest matters because it lets the cheese settle. Cutting too soon makes the sliders harder to serve cleanly.
When I tested the pan for a quick serve, the rested version held together better than the one cut right away. That small pause is the difference between tidy Hot Italian Sub Sliders and a messy tray.
What simple swaps work in Hot Italian Sub Sliders?
Simple swaps can keep the structure of Hot Italian Sub Sliders intact while adjusting what you already have on hand. Stay close to the original formula so the bake time, texture, and serving style remain the same.
- Swap the rolls. Use soft dinner rolls if you do not have Hawaiian rolls, but keep them split horizontally. The texture will be slightly less sweet and less pillowy.
- Swap the cheese. Use another meltable sliced cheese if provolone is unavailable, but keep the slices thin. The flavor will shift, yet the sliders will still melt well.
- Adjust the heat level. Leave out the red pepper flakes for a milder result or keep them for a little bite. This change affects spice only, not the bake structure.
For Italian night ideas, the safest swaps are the ones that preserve the layered deli-meat structure and the buttery top. That keeps the recipe recognizable and keeps the same 25-minute baking rhythm.
How do you store and reheat Hot Italian Sub Sliders?
Store leftover Hot Italian Sub Sliders in an airtight container in the refrigerator after they cool. They keep best for 3 to 4 days, and the buns stay in better shape if you separate layers with parchment when possible.
Reheat them in a 350°F oven until warmed through so the tops regain some texture. I recommend this over the microwave because the oven helps the bread stay firmer and the cheese melts again without making the sliders soggy.
For make-ahead use, assemble the pan and refrigerate it before baking, then add the butter mixture just before it goes into the oven. That approach works well for party snacks cold on the table before service, followed by a hot tray at kickoff or dinner time.
Hot Italian Sub Sliders
Ingredients
Equipment
Method
- Preheat the oven to 350°F (175°C). Lightly grease a 9x13-inch baking dish or line it with parchment paper.
- In a small bowl, whisk together the melted butter, olive oil, minced garlic, Italian seasoning, Parmesan, parsley, red pepper flakes if using, Dijon mustard, mayonnaise, garlic powder, salt, and black pepper.
- Place the bottom halves of the slider buns in the prepared baking dish.
- Layer each bun with ham, salami, pepperoni, and provolone cheese, dividing the ingredients evenly among the sliders.
- Place the top halves of the buns over the fillings.
- Brush or drizzle the butter mixture evenly over the tops of the sliders, making sure to cover each one.
- Cover the dish with foil and bake for 15 minutes.
- Remove the foil and bake for 5 to 8 minutes more, until the tops are golden and the cheese is melted.
- Let the sliders cool for 2 to 3 minutes, then slice and serve warm.
Notes
Loved this recipe? Save it to your favorite Pinterest board so you can easily find it later! ✨