

This post contains affiliate links. As an Amazon Associate, I earn from qualifying purchases. This comes at no extra cost to you.
Table of Contents
- What Are Cheeseburger Sliders and Why Do They Work So Well?
- What Ingredients Do You Need for Cheeseburger Sliders?
- How Do You Make Cheeseburger Sliders Step by Step?
- Frequently Asked Questions About Cheeseburger Sliders
- What Easy Substitutions Can You Make?
- What Pro Tips Help These Sliders Turn Out Better?
- What Should You Serve With Cheeseburger Sliders?
- What Mistakes Should You Avoid?
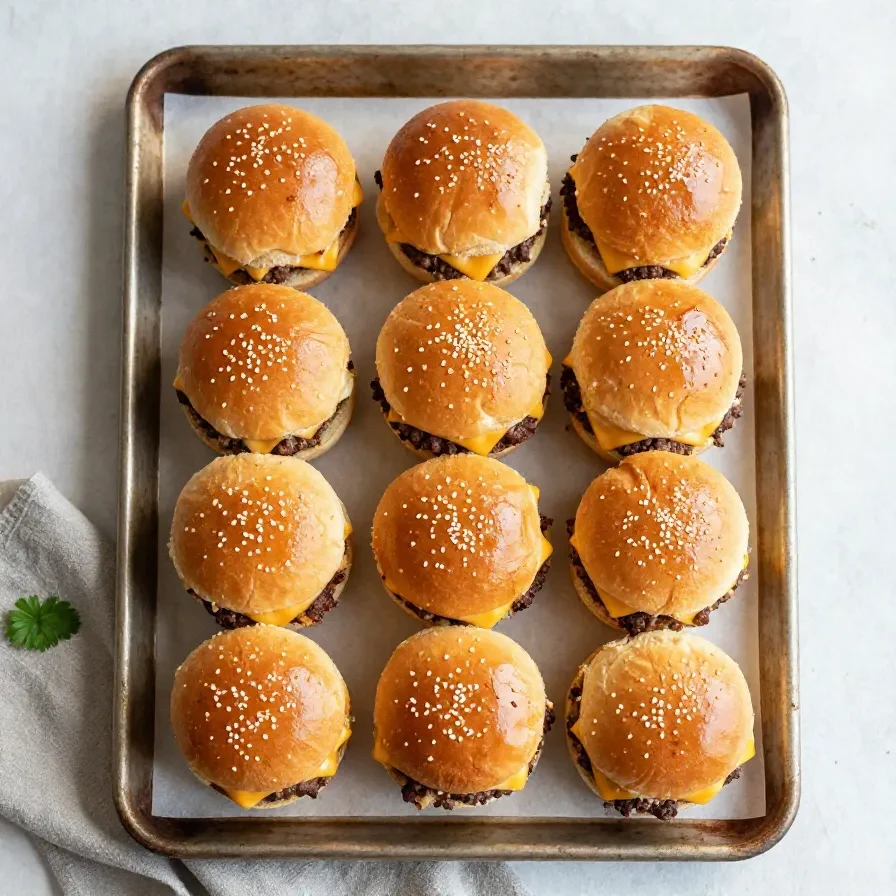
Hamburger meat sliders are small baked sandwiches made with seasoned ground beef, cheddar cheese, soft slider buns, and a buttery sesame seed topping, ready in about 35 minutes total. This Cheeseburger Sliders recipe makes 12 sliders and uses a skillet plus the oven for a fast, even finish. They are a practical choice for game day, parties, and easy family dinners.
I am Alexia Michaels, a senior health and fitness researcher at XNutrion, and I rely on recipes like this when I need a fast, reliable dinner that still feels organized and complete. I tested this version with the exact 15-minute prep and 20-minute cook timing, which makes it easy to plan around kickoff or a busy weeknight.
The finished Cheeseburger Sliders have browned beef, melted cheddar, and soft tops brushed with butter, so each bite has a familiar burger texture without the size or mess of full sandwiches. The sesame seeds add a little crunch, and the pickles, ketchup, and mustard keep every serving sharp and balanced.
What Are Cheeseburger Sliders and Why Do They Work So Well?
Hamburger Meat Sliders work because they combine seasoned beef, cheddar cheese, and soft buns in a format that is easy to portion and serve. Cheeseburger Sliders fit game-day tables, weeknight dinners, and party trays because they bake together in one dish and stay warm well when covered loosely with foil.
- They are easy to portion. Twelve sliders from one pound of beef make serving simple. That helps when I am planning Easy Group Meals Dinner for a mixed crowd.
- They bake efficiently. The oven stays at 350°F, which gives the buns time to heat through while the cheese melts. That keeps the assembly fast and the texture even.
- They travel well on a table. The sliders stay contained in the baking dish until serving, so they are useful for Party Sliders Easy setups. You can move them from oven to table without extra plating.
- They work for different ages. The mild seasoning and familiar toppings make them useful for Kid Friendly Meals With Hamburger and Kid Approved Dinner Ideas. The flavor stays recognizable without being overly complicated.
I use this style when I need a dependable Burger Slider Ideas option that does not demand extra side dishes or special equipment. For a football watch party, the same tray can sit next to pickles, chips, and dips without losing structure.
What Ingredients Do You Need for Cheeseburger Sliders?
Cheeseburger Sliders use a short ingredient list built around 1 pound of ground beef, 12 slider buns, and 6 slices of cheddar cheese. The seasoning is simple but effective, and the melted butter with sesame seeds gives the tops a finished look and a better surface for baking.
- 1 pound ground beef
- 1 teaspoon salt
- 1/2 teaspoon black pepper
- 1/2 teaspoon garlic powder
- 1/2 teaspoon onion powder
- 1 tablespoon Worcestershire sauce
- 12 slider buns
- 6 slices cheddar cheese, halved
- 2 tablespoons butter, melted
- 1 teaspoon sesame seeds
- 1 tablespoon diced onion, optional
- Pickles, for serving
- Ketchup and mustard, for serving
The Worcestershire sauce matters because it deepens the beef flavor without adding extra steps. The cheddar slices matter because halving them helps the cheese cover the sliders more evenly, which is useful when I am building easy cookout recipes or Kid Supper Ideas that need to hold together on a plate.
How Do You Make Cheeseburger Sliders Step by Step?
The method for Cheeseburger Sliders is straightforward: season and cook the beef, assemble the buns and cheese in a baking dish, then bake until the tops are golden and the cheese is melted. I like this process because it keeps the stove work short and lets the oven finish the job in two quick stages.
Step 1 — Heat the oven
Preheat the oven to 350°F (175°C) and lightly grease a baking dish or sheet pan. This gives the sliders a nonstick base and helps the bottoms warm evenly during baking.
Step 2 — Season the beef
In a bowl, mix the ground beef with salt, black pepper, garlic powder, onion powder, and Worcestershire sauce until just combined. The goal is even seasoning without compacting the meat too much.
Step 3 — Cook the filling
Cook the beef in a skillet over medium heat, breaking it up with a spoon, until browned and cooked through. Drain excess grease if needed so the finished sliders do not turn soggy.
Step 4 — Build the base
Slice the slider buns in half horizontally and place the bottom halves in the prepared baking dish. This creates a stable base for the beef and helps the batch hold together when it comes out of the oven.


Step 5 — Add beef and cheese
Spread the cooked beef evenly over the bottom buns, then top with cheddar cheese slices. Add diced onion if using, keeping it light so the texture stays balanced in every bite.
Step 6 — Finish the tops
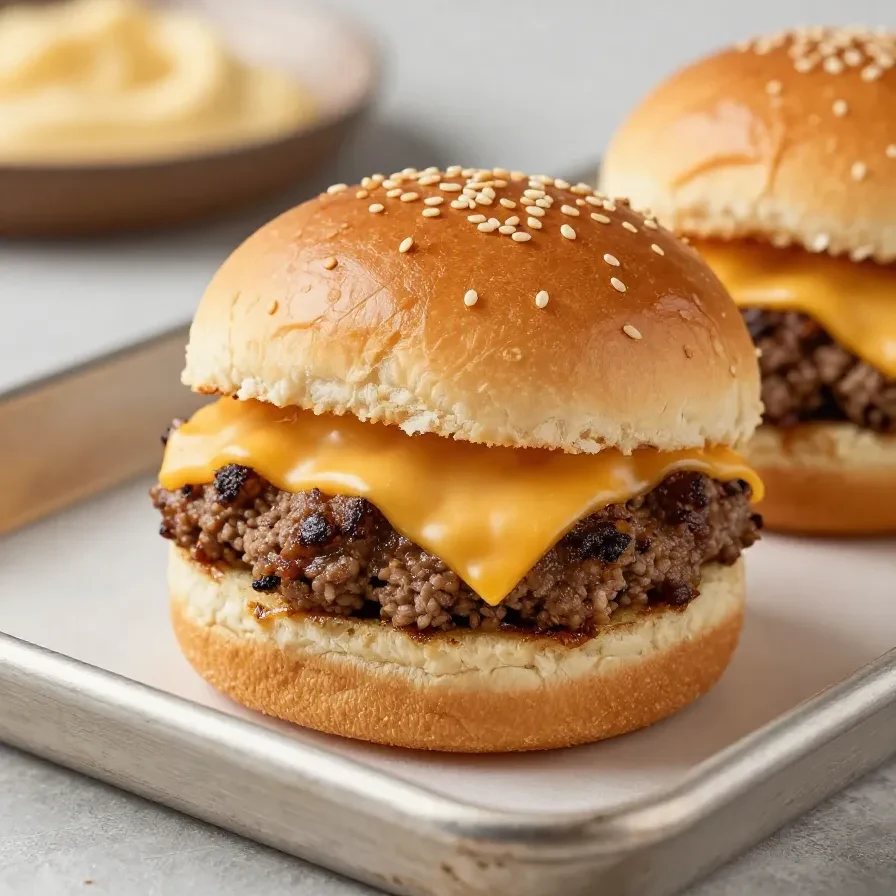
Place the top halves of the buns over the cheese. Brush the tops with melted butter and sprinkle with sesame seeds for a golden finish and a little crunch.
Step 7 — Bake and serve
Cover loosely with foil and bake for 10 minutes, then remove the foil and bake for 3 to 5 more minutes until the tops are golden and the cheese is melted. Remove from the oven, separate into sliders, and serve warm with pickles, ketchup, and mustard.
Frequently Asked Questions About Cheeseburger Sliders
How many Cheeseburger Sliders does this recipe make?
This recipe makes 12 sliders. That amount works well for a small gathering, a weeknight dinner, or a game-day spread with a few sides.
Can I make these ahead of time?
Yes, you can cook the beef ahead of time and assemble the tray later. For the best texture, I bake them close to serving time so the buns stay soft and the cheese melts fully.
Do Cheeseburger Sliders need foil while baking?
Yes, the foil helps the tops warm through without overbrowning too soon. Removing it for the last 3 to 5 minutes gives the buns color and helps the cheese finish melting.
What toppings go best with them?
Pickles, ketchup, and mustard are the standard serving options for this recipe. They add acidity and contrast, which helps the seasoned beef and cheddar taste more balanced.
Can I serve them at a football watch party?
Yes, they are a strong choice for a football watch party because they are portioned, easy to pass, and simple to pair with sides. I find they work especially well when the rest of the table includes finger foods that hold their shape.
What Easy Substitutions Can You Make?
Small substitutions can keep Cheeseburger Sliders flexible without changing the recipe into something else. I recommend staying close to the original method so the beef, cheese, and buns still bake together cleanly.
- Use diced onion as optional or leave it out. The sliders stay milder without it, while the onion adds a little sharpness if you want more bite.
- Choose a different mustard style for serving. Yellow mustard tastes brighter, while a grainier style adds texture. Keep the amount modest so it does not overpower the beef.
- Skip sesame seeds if needed. The tops will still brown, but you lose the light crunch and classic burger look.
I keep the swaps minor because this is meant to stay in the Easy Slider Ideas category, not become a different dish. That approach also helps when I plan Kid Approved Dinner Ideas and want one tray to taste familiar to most guests.
What Pro Tips Help These Sliders Turn Out Better?
A few simple habits improve texture, flavor, and timing. These details matter because Cheeseburger Sliders are short on ingredients, so each step has a visible effect on the finished tray.
- Do not overmix the beef. Mixing until just combined keeps the texture tender instead of dense.
- Drain the grease after cooking. Less grease means the buns stay firmer and the bottom layer does not slide apart.
- Brush the tops evenly with butter. Even coverage helps the sesame seeds stick and encourages a uniform golden finish.
- Cover loosely, not tightly, with foil. Loose foil traps heat without steaming the tops too heavily, which helps the final 3 to 5 minutes work better.
I tested this tray for a tight 35-minute window, and the loose-foil step made the biggest difference in keeping the buns soft while still letting the tops color. That matters when you need Easy Group Meals Dinner timing to line up with guests arriving or kickoff starting.
What Should You Serve With Cheeseburger Sliders?
Cheeseburger Sliders pair well with sides that are easy to grab, easy to carry, and simple to eat while standing or sitting in front of a screen. For a football game food spread, I build around one hot tray, one crunchy side, and one or two dipping or pick-up items that hold up well on the table.
- Pickles and condiments. These are already part of the recipe and keep serving simple. The acidity also cuts through the cheddar and beef.
- Chips or crisp snack foods. They add crunch and are easy to portion into bowls for a game-day table. This keeps the meal casual and fast-moving.
- Cold vegetables or a simple veggie tray. A cool, crisp side balances the warm sliders and gives guests another hand-held option. That helps when you are planning for a mixed crowd.
- A second tray of finger foods. If you need more than 12 portions, this recipe scales best when paired with another easy-to-pass item. For a related savory option, my readers often use our hot italian sub sliders on the same table.
For portion planning, I treat 2 sliders per adult as a practical starting point and 1 slider for younger eaters, then add a side or two to stretch the table. If you want a second cheeseburger-style option, our easy cheeseburger sliders recipe can help you build a larger spread without changing the serving style.
What Mistakes Should You Avoid?
A few avoidable problems can affect the texture of Cheeseburger Sliders. The good news is that each one is easy to fix before the tray goes into the oven.
- Do not skip draining excess grease. Too much fat can make the bottom buns soggy and harder to separate.
- Do not overbake the sliders. The recipe needs only 10 minutes covered plus 3 to 5 minutes uncovered, so extra time can dry out the buns.
- Do not overload with toppings inside the tray. Pickles, ketchup, and mustard work best as serving items so the sliders stay structured.
When I keep the tray simple, the result is more predictable and easier to serve to a group. That consistency is useful for Easy Cookout Recipes and for any night when I need a reliable dinner with a 12-slider yield.
Cheeseburger Sliders
Ingredients
Equipment
Method
- Preheat the oven to 350°F (175°C) and lightly grease a baking dish or sheet pan.
- In a bowl, mix the ground beef with salt, black pepper, garlic powder, onion powder, and Worcestershire sauce until just combined.
- Cook the beef in a skillet over medium heat, breaking it up with a spoon, until browned and cooked through. Drain excess grease if needed.
- Slice the slider buns in half horizontally and place the bottom halves in the prepared baking dish.
- Spread the cooked beef evenly over the bottom buns, then top with cheddar cheese slices. Add diced onion if using.
- Place the top halves of the buns over the cheese. Brush the tops with melted butter and sprinkle with sesame seeds.
- Cover loosely with foil and bake for 10 minutes. Remove the foil and bake for 3 to 5 more minutes, until the tops are golden and the cheese is melted.
- Remove from the oven, separate into sliders, and serve warm with pickles, ketchup, and mustard.
Notes
Loved this recipe? Save it to your favorite Pinterest board so you can easily find it later! ✨


[…] You might also enjoy our cheeseburger sliders. […]