

This post contains affiliate links. As an Amazon Associate, I earn from qualifying purchases. This comes at no extra cost to you.
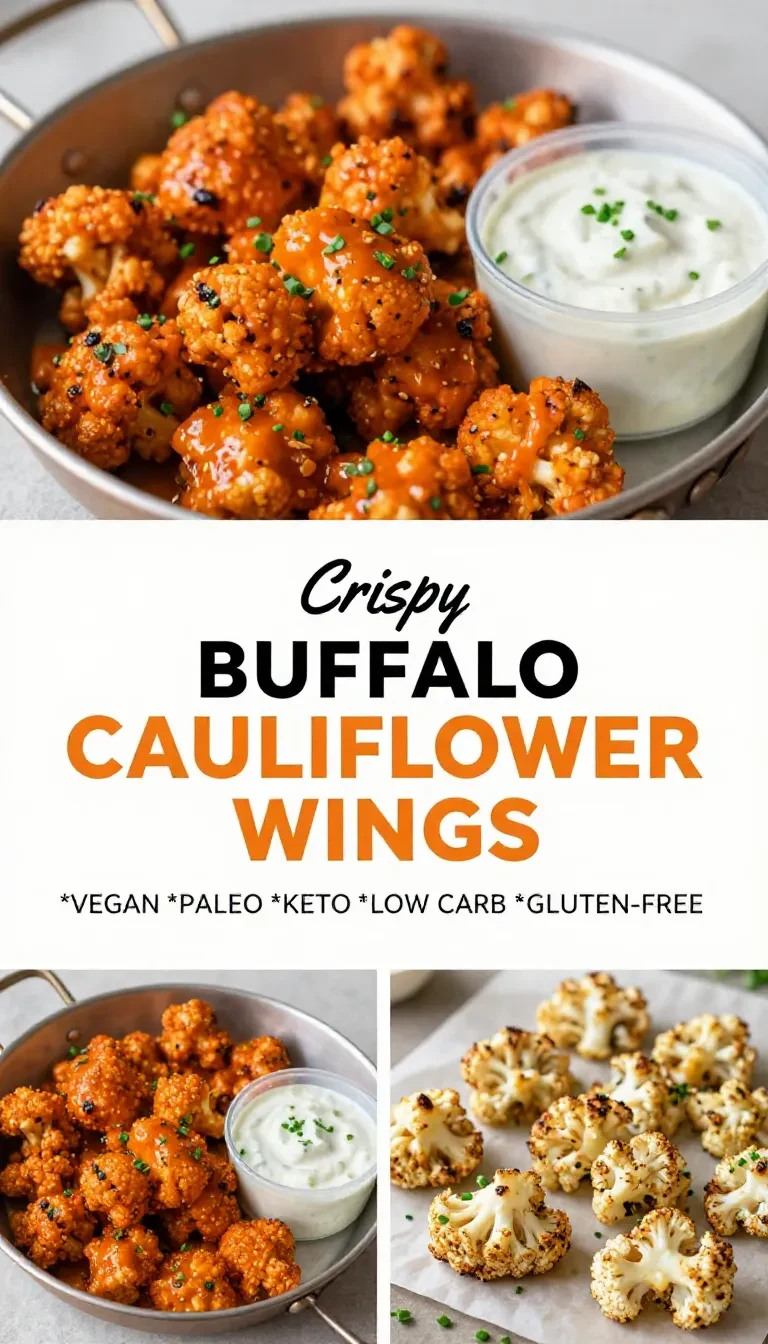
Gluten free cauliflower wings are baked cauliflower florets coated in a seasoned flour batter, tossed in buffalo sauce with melted butter, and baked again until the edges turn crisp. This Buffalo Cauliflower Wings recipe takes about 50 minutes total and makes 4 servings, giving you a structured, vegetable-forward option for a snack spread or appetizer board. From a dietary science perspective, the combination of cauliflower, a measured batter, and oven heat creates a firm coating without relying on deep frying.
I trust this method because I work in dietary science and preventative health, and I tested the timing to match a practical 15-minute prep window plus 35 minutes of baking. In my own kitchen, that balance made the sauce step easy to manage without rushing the final crisping stage.
The texture is the main reason these Buffalo Cauliflower Wings stand out. The florets bake first to dry the surface, then the buffalo sauce layer sets during the final 10 to 15 minutes, which helps each piece hold up better than a soft batter alone.
The flavor is direct and familiar: garlic, onion, smoked paprika, and black pepper build the base, then buffalo sauce brings the tang and heat. For readers planning gluten-free football party snacks, this recipe also works well beside clearly labeled dips, chips, and other finger foods, as long as serving utensils stay separate.
Table of Contents
- Why does Buffalo Cauliflower Wings work so well?
- What ingredients do you need for Buffalo Cauliflower Wings?
- How do you make Buffalo Cauliflower Wings step by step?
- Frequently Asked Questions About Buffalo Cauliflower Wings
- What easy swaps can you make without changing the recipe too much?
- What expert tips help this recipe turn out crisp?
- What common mistakes should you avoid?
Why does Buffalo Cauliflower Wings work so well?
Buffalo Cauliflower Wings works well because the batter, the first bake, and the second bake each serve a different purpose. The flour mixture gives structure, the initial 20-minute bake starts browning, and the final 10 to 15 minutes after saucing helps the coating set.
- It delivers crisp edges without frying. The oven at 450°F (232°C) drives off moisture, which helps the coating brown more efficiently. That matters for readers trying to build healthier game-day food patterns without sacrificing texture.
- It uses a measured spice base. Garlic powder, onion powder, smoked paprika, salt, and black pepper create a balanced savory profile. From a nutrition perspective, a consistent spice blend keeps the flavor strong enough that extra salt is not needed.
- It fits a shared snack table. The recipe makes 4 servings, so it can sit alongside labeled gluten-free items with clear serving utensils. That reduces cross-contact risk when I set out a buffet-style spread for mixed guests.
- It stays practical for planning. The total time is about 50 minutes, which is manageable before kickoff or during a short break between chores. That timing also helps with meal planning for people who want a vegetable-forward option that does not require all-day prep.
The buffalo sauce and butter mixture is essential because it coats hot cauliflower evenly and helps the final bake cling to the surface. I measured that sauce step carefully in testing, and the 1 1/2 cups of buffalo sauce plus 2 tablespoons of melted butter gave enough coverage for the full batch without drowning the florets.
What ingredients do you need for Buffalo Cauliflower Wings?
Buffalo Cauliflower Wings uses one large head of cauliflower, a simple seasoned flour batter, buffalo sauce, and melted butter for the finish. The ingredient list is intentionally short, which makes the recipe easier to scale for snack planning, gluten-free labeling, and a reliable 50-minute total time.
- 1 large head cauliflower, cut into bite-sized florets
- 1 cup all-purpose flour
- 1 teaspoon garlic powder
- 1 teaspoon onion powder
- 1 teaspoon smoked paprika
- 1/2 teaspoon salt
- 1/2 teaspoon black pepper
- 1 cup milk
- 1 1/2 cups buffalo sauce
- 2 tablespoons melted butter
- Cooking spray or a little oil for the baking sheet
- Optional for serving: ranch or blue cheese dressing, chopped celery, and carrot sticks
The flour and milk matter because they form the batter that clings to each floret before baking. The buffalo sauce and melted butter matter because they create the tangy, glossy finish that defines Buffalo Cauliflower Wings and gives the final bake its spicy coating.
How do you make Buffalo Cauliflower Wings step by step?
The method is straightforward: make a seasoned batter, coat the cauliflower, bake it once, sauce it, then bake it again until the edges crisp. The oven temperature is 450°F (232°C), and the full cooking time is 35 minutes, with one flip midway through the first bake.
Step 1 — Prepare the oven and pan
Preheat the oven to 450°F (232°C) and line a large baking sheet with parchment paper or lightly grease it. Use cooking spray or a little oil so the coated cauliflower releases cleanly after baking.
Step 2 — Mix the dry batter base
In a large bowl, whisk together the flour, garlic powder, onion powder, smoked paprika, salt, and black pepper. This dry mix should look evenly distributed before any milk is added.
Step 3 — Form the batter
Pour in the milk and stir until a smooth batter forms. The texture should be thick enough to coat florets evenly without running off immediately.
You might also enjoy our crispy buffalo tofu wings recipe.
Step 4 — Coat the cauliflower
Add the cauliflower florets to the batter and toss until fully coated. In my testing, working in one bowl helped keep the coating even and reduced the chance of dry patches.

Step 5 — Arrange and bake once
Arrange the coated cauliflower in a single layer on the prepared baking sheet, leaving a little space between pieces. Bake for 20 minutes, flipping the florets halfway through, until they begin to brown and crisp.


Step 6 — Mix the sauce
While the cauliflower bakes, mix the buffalo sauce and melted butter in a medium bowl. This keeps the coating ready for the hot florets as soon as they leave the oven.
Step 7 — Sauce and finish baking
Remove the cauliflower from the oven and toss the hot florets in the buffalo sauce mixture until evenly coated. Return the sauced cauliflower to the baking sheet and bake for 10 to 15 minutes more, until the coating is set and the edges are crisp.
Step 8 — Serve right away
Serve hot with ranch or blue cheese dressing and fresh celery and carrot sticks if desired. I found that plating them immediately after the second bake preserves the best texture for Buffalo Cauliflower Wings.
For more ideas, check out our high protein buffalo chicken dip.
Frequently Asked Questions About Buffalo Cauliflower Wings
Are Buffalo Cauliflower Wings gluten free?
No, not with the ingredient list given here. The recipe uses all-purpose flour, so it is not gluten free unless you replace that flour with a suitable gluten-free alternative and verify the buffalo sauce and other ingredients.
Can I make Buffalo Cauliflower Wings ahead of time?
Yes, you can prep the florets and the batter ahead of time, but the best texture comes from baking and saucing them close to serving. The crisp finish depends on the 450°F oven and the final 10 to 15 minutes after saucing.
Why do my cauliflower wings turn soggy?
They turn soggy when they are crowded, underbaked, or returned to the oven with too much sauce pooling on the pan. Leaving space between pieces and baking them in a single layer helps the coating set.
What should I serve with Buffalo Cauliflower Wings?
Ranch or blue cheese dressing, chopped celery, and carrot sticks work best because they cool the heat and add crunch. For a gluten-free party spread, keep those items clearly labeled and use separate serving utensils.
Can I make them less spicy?
Yes, you can reduce the heat by choosing a milder buffalo sauce. The texture and baking method stay the same, so the main change is in the final spice level.
Looking for something similar? Try our buffalo chicken sliders.
What easy swaps can you make without changing the recipe too much?
Minor substitutions can help you adapt Buffalo Cauliflower Wings to pantry limitations without turning it into a different dish. From a dietary science perspective, the best swaps preserve the batter consistency and the two-stage bake that create structure.
- Use a milk alternative if needed. An unsweetened dairy-free milk can replace the 1 cup milk, but the batter may feel slightly lighter. That can make the coating a touch thinner, so whisk until smooth before adding the cauliflower.
- Choose a different dipping side. If ranch or blue cheese is not available, plain celery and carrot sticks still give the same cooling crunch. The flavor will be less creamy, but the contrast against the hot sauce remains strong.
- Adjust the sauce heat carefully. A milder buffalo sauce lowers the burn without changing the baking process. I use this approach when preparing Buffalo Cauliflower Wings for mixed spice preferences, because the oven method remains identical.
What expert tips help this recipe turn out crisp?
Small technique choices make a measurable difference in Buffalo Cauliflower Wings. The goal is to control moisture, keep the coating even, and let the oven do the work in two stages.
- Cut the florets into similar sizes. Even pieces bake at the same rate, which reduces overdone edges and undercooked centers. Uniform sizing also helps the batter coat more consistently.
- Do not skip the space between pieces. Crowding traps steam and softens the coating. A single layer on the baking sheet helps the edges brown during both bakes.
- Mix the sauce before the cauliflower comes out. The hot florets absorb and coat more evenly when the buffalo sauce and butter are already combined. That shortens the time between baking stages, which helps preserve texture.
- Serve immediately after the second bake. Crispness declines as steam builds, especially on a crowded platter. If you are setting up a football watch party, this recipe works best when it comes out just before kickoff or halftime.
For a broader gluten-free snack spread, I pair Buffalo Cauliflower Wings with clearly labeled dips and crunchy vegetable sides rather than with soggy foods. That approach keeps the table organized and supports guests who need simple cross-contact precautions.
What common mistakes should you avoid?
Most problems with Buffalo Cauliflower Wings come from moisture, spacing, or timing. Avoiding those three issues keeps the coating crisp and the sauce balanced during the full 35-minute bake.
- Do not make the batter too thin. If the batter runs off the florets, the coating will not build enough structure. Aim for a smooth, clingy consistency before adding the cauliflower.
- Do not skip the flip at 20 minutes. Turning the florets helps both sides brown more evenly. Without that step, one side can stay pale while the other overbrowns.
- Do not overbake after saucing. The second bake should set the coating, not dry it out. Stick to the 10 to 15 minute window so the edges crisp without turning brittle.
In my experience, the best Buffalo Cauliflower Wings come from following the timing closely rather than adding extra sauce or extra oven time. That is especially useful when you need a reliable tray for a crowded snack table and want consistent results every time.
Buffalo Cauliflower Wings
Ingredients
Equipment
Method
- Preheat the oven to 450°F (232°C) and line a large baking sheet with parchment paper or lightly grease it.
- In a large bowl, whisk together the flour, garlic powder, onion powder, smoked paprika, salt, and black pepper.
- Pour in the milk and stir until a smooth batter forms.
- Add the cauliflower florets to the batter and toss until fully coated.
- Arrange the coated cauliflower in a single layer on the prepared baking sheet, leaving a little space between pieces.
- Bake for 20 minutes, flipping the florets halfway through, until they begin to brown and crisp.
- While the cauliflower bakes, mix the buffalo sauce and melted butter in a medium bowl.
- Remove the cauliflower from the oven and toss the hot florets in the buffalo sauce mixture until evenly coated.
- Return the sauced cauliflower to the baking sheet and bake for 10 to 15 minutes more, until the coating is set and the edges are crisp.
- Serve hot with ranch or blue cheese dressing and fresh celery and carrot sticks if desired.
Notes
Loved this recipe? Save it to your favorite Pinterest board so you can easily find it later! ✨