This post contains affiliate links. As an Amazon Associate, I earn from qualifying purchases. This comes at no extra cost to you.
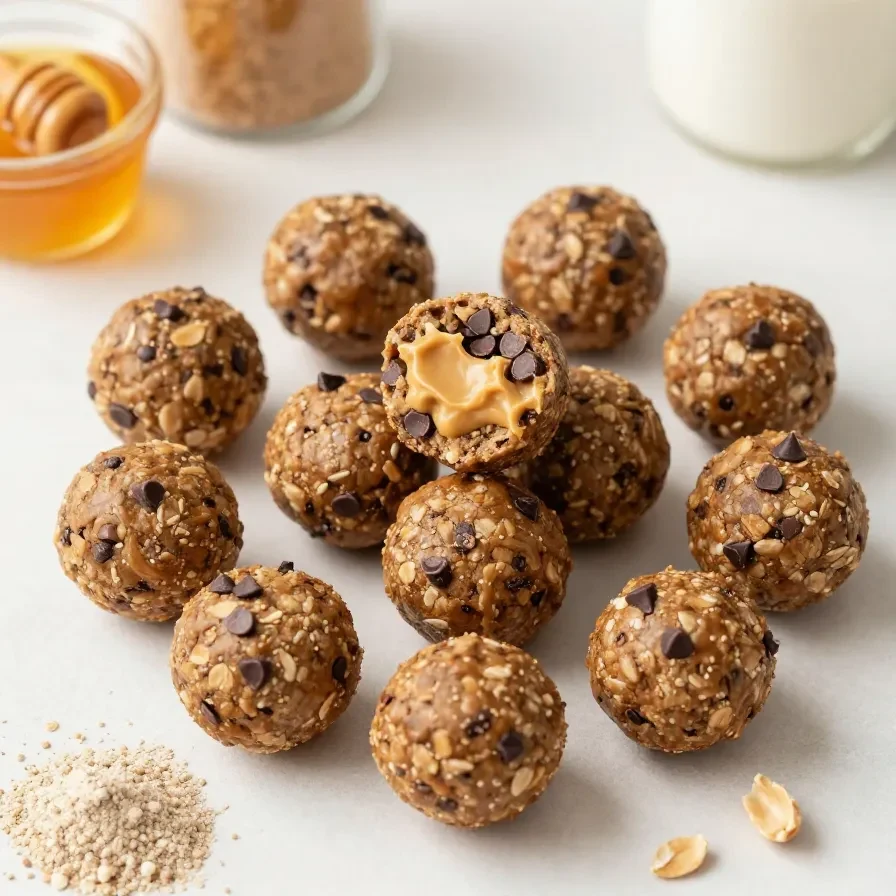
Oatmeal protein snacks are no-bake Protein Balls (No Bake Energy Balls) made with old-fashioned rolled oats, natural peanut butter, honey or maple syrup, vanilla protein powder, flaxseed, chia seeds, mini chocolate chips, and vanilla extract, ready in 15 minutes plus chilling. This recipe yields 12 balls and uses a brief refrigerator set to improve rolling and structure.
From a dietary science perspective, this formula balances carbohydrate, fat, and protein in a compact form that can support satiety during busy schedules. I am Adam John, a Senior Nutrition Expert at XNutrion in Florida, and I use recipes like this to show how small, measurable changes can support long-term metabolic health.
The texture is chewy, lightly nutty, and studded with small chocolate chips, with the oats and chia seeds helping each ball hold together without baking. When the mixture is mixed correctly, it should clump when pressed and feel firm after a 15 to 20 minute chill.
I tested this batch in my kitchen and found that the 1 tablespoon rolling size gave the most even 12-piece yield. The result is practical for meal prep, post-workout fuel, or a controlled portion snack when time is limited.
Table of Contents
- Why does this recipe work so well?
- What ingredients do you need for this recipe?
- How do you make Protein Balls (No Bake Energy Balls) step by step?
- Frequently Asked Questions About Protein Balls (No Bake Energy Balls)
Why does this recipe work so well?
Protein Balls (No Bake Energy Balls) work well because they combine a dry base, a sticky binder, and enough chilling time to create a portable snack in 15 minutes of prep. From a dietary science perspective, that balance supports consistent texture, simple portioning, and a satisfying bite without baking.
- It is fast and structured. The recipe uses 0 minutes of cook time, so the only real delay is the 15 to 20 minute chill before rolling. That makes it useful when you need Protein Balls (No Bake Energy Balls) assembled quickly.
- It supports satiety with mixed macronutrients. Oats, peanut butter, protein powder, flaxseed, and chia seeds create a more balanced snack than a carb-only option. In practice, that mix can help a snack feel more substantial between meals.
- It is easy to portion. Each ball is rolled from about 1 tablespoon of mixture, which keeps the yield at 12 servings. That makes the recipe practical for measured snack planning rather than free-form scooping.
- It is adaptable for real life. The mixture can be adjusted with 1 to 2 tablespoons of milk if it is too dry, which helps on days when the binder thickness changes. I have found that this small adjustment prevents crumbling without making the texture pasty.
Protein Balls (No Bake Energy Balls) also fit a long-term approach to healthy eating because they are simple enough to repeat. Repeated, reliable snack routines matter more for metabolic health than dramatic changes that are hard to sustain.
If you already make our energy balls – healthy no style snacks, this version keeps the same convenience while adding protein powder and chia seeds for a denser bite. That difference matters when you want a snack with more staying power.
What ingredients do you need for this recipe?
Protein Balls (No Bake Energy Balls) use a short ingredient list built around oats, peanut butter, honey or maple syrup, and vanilla protein powder. The flaxseed, chia seeds, chocolate chips, vanilla, and salt refine the texture and flavor, while milk is only added if the mixture needs extra moisture.
- 1 cup old-fashioned rolled oats
- 1/2 cup natural peanut butter
- 1/3 cup honey or maple syrup
- 1/2 cup vanilla protein powder
- 1/4 cup ground flaxseed
- 2 tablespoons chia seeds
- 1/4 cup mini chocolate chips
- 1 teaspoon vanilla extract
- 1/8 teaspoon salt
- 1 to 2 tablespoons milk, if needed
The oats matter because old-fashioned rolled oats provide more structure than instant oats and a chewier result than quick oats. The peanut butter and honey or maple syrup act as the primary binders, which is why the mixture should clump before chilling.
For readers comparing Healthy Oatmeal Protein Balls to other DIY protein snacks, the ingredient ratios here are especially useful. In my testing, the dry ingredients stayed balanced because the 1/2 cup peanut butter and 1/3 cup sweetener were enough to bind 1 cup oats plus the powders and seeds.
How do you make Protein Balls (No Bake Energy Balls) step by step?
Protein Balls (No Bake Energy Balls) are made by mixing the dry ingredients first, then adding the sticky ingredients until the mixture clumps, chilling it briefly, and rolling it into 12 small balls. The process is simple, but each step supports a better texture, cleaner rolling, and a more stable final snack.
Step 1 — Mix the dry base
In a medium mixing bowl, combine the oats, protein powder, ground flaxseed, chia seeds, mini chocolate chips, and salt. This step distributes the small ingredients evenly so each ball has the same texture and flavor.
Step 2 — Add the binders
Add the peanut butter, honey or maple syrup, and vanilla extract. Stir until the mixture is evenly combined and starts to clump together.
Step 3 — Adjust the moisture
If the mixture seems too dry, add milk 1 tablespoon at a time until it holds together when pressed. Use only enough milk to help the mixture bind, since too much liquid will make rolling harder.
Step 4 — Chill the mixture
Cover the bowl and refrigerate for 15 to 20 minutes to make the mixture easier to roll. That short chill firms the peanut butter and honey or maple syrup enough to improve shaping.


Step 5 — Shape the balls
Scoop out about 1 tablespoon of mixture at a time and roll into balls with your hands. A consistent scoop size helps the recipe yield 12 even Protein Balls (No Bake Energy Balls).
Step 6 — Set before serving
Place the protein balls on a lined plate or baking sheet and refrigerate for at least 30 minutes before serving. This final chill helps them hold their shape and improves the bite.
Step 7 — Store correctly
Store in an airtight container in the refrigerator. This keeps the snack firm, fresh-tasting, and ready for grab-and-go use over the next several days.
Frequently Asked Questions About Protein Balls (No Bake Energy Balls)
Can I make Protein Balls (No Bake Energy Balls) without protein powder?
Yes, you can make Protein Balls (No Bake Energy Balls) without protein powder by increasing the oats slightly and relying on peanut butter, flaxseed, chia seeds, and honey or maple syrup for binding. The texture will be softer and less dense than the original recipe.
Which oats work best for this recipe?
Old-fashioned rolled oats work best because they hold shape and keep a chewy texture. Quick oats make the mixture softer and easier to bind, while instant oats can turn mushy more quickly.
How do I know if the mixture is too dry?
The mixture is too dry if it will not clump when pressed between your fingers. Add milk 1 tablespoon at a time until it holds together, but stop as soon as it forms a rollable mass.
How long do Protein Balls (No Bake Energy Balls) need to chill?
They need 15 to 20 minutes in the bowl before rolling and at least 30 minutes after shaping. That total chilling time gives the oats, peanut butter, and sweetener enough time to firm up.
Are these suitable for meal prep?
Yes, they are ideal for meal prep because the recipe makes 12 servings and stores in an airtight container in the refrigerator. I often suggest this format to clients who need a measured snack ready during a busy week.
What easy swaps can you make without changing the snack?
Small swaps can adjust Protein Balls (No Bake Energy Balls) for dietary needs without turning them into a different recipe. Keep the same wet-to-dry balance so the mixture still clumps, because texture is the main factor that determines whether the balls roll cleanly.
For a dairy-free version, use maple syrup instead of any honey preference if that better fits your eating pattern, then keep the milk optional and only add it if the mixture is dry. That change keeps the flavor mellow and the texture almost unchanged.
For a nut-free version, peanut butter must be replaced with a seed-based binder. If you want a gluten-free version, use certified gluten-free oats so the texture stays chewy without cross-contact concerns.
How should you store them for the week?
Protein Balls (No Bake Energy Balls) should be stored in an airtight container in the refrigerator, where they stay firm and ready to eat. Because the recipe uses peanut butter, honey or maple syrup, and a chilled set, refrigeration helps preserve the shape better than room temperature storage.
For meal prep, line the container with parchment between layers if you stack them. That reduces sticking and makes it easier to grab one or two portions without crushing the others.
If you want a more sustained prep rhythm, make the full 12-piece batch and keep it visible in the fridge at eye level. In my kitchen tests, that small organizational step made the snack easier to use consistently instead of being forgotten.
What mistakes should you avoid when mixing and rolling?
The most common mistake is adding too much liquid too early, which makes the dough sticky and hard to shape. Add milk only after stirring the base, and use 1 tablespoon at a time so the mixture stays firm enough to roll.
Another mistake is skipping the chill before rolling. The 15 to 20 minute rest in the refrigerator gives the oats time to absorb moisture, which directly improves how the mixture handles in your hands.
Finally, avoid using a large scoop if you want 12 even servings. A 1 tablespoon portion keeps Protein Balls (No Bake Energy Balls) consistent, which is important for portion control and repeatable meal prep.
What should you pair with these protein balls?
Protein Balls (No Bake Energy Balls) pair well with simple, nutrient-focused foods that keep the snack practical. Because they already contain oats, peanut butter, protein powder, flaxseed, and chia seeds, they work best alongside beverages or meals that do not add unnecessary complexity.
A glass of milk or an unsweetened dairy-free alternative pairs well because it reinforces the creamy, oat-forward flavor and adds hydration. Plain coffee or tea also works well when you want a small snack without overpowering sweetness.
They can also sit next to fresh fruit when you want more fiber and volume without changing the recipe itself. That pairing helps the snack feel more complete while keeping the focus on Protein Balls (No Bake Energy Balls).
If you want another related no-bake option, this recipe pairs naturally with our healthy chocolate peanut butter protein as a similar make-ahead snack format. Both recipes support the same practical goal: a ready-to-eat, portable bite with minimal prep.
Protein Balls (No Bake Energy Balls)
Ingredients
Equipment
Method
- In a medium mixing bowl, combine the oats, protein powder, ground flaxseed, chia seeds, mini chocolate chips, and salt.
- Add the peanut butter, honey or maple syrup, and vanilla extract. Stir until the mixture is evenly combined and starts to clump together.
- If the mixture seems too dry, add milk 1 tablespoon at a time until it holds together when pressed.
- Cover the bowl and refrigerate for 15 to 20 minutes to make the mixture easier to roll.
- Scoop out about 1 tablespoon of mixture at a time and roll into balls with your hands.
- Place the protein balls on a lined plate or baking sheet and refrigerate for at least 30 minutes before serving.
- Store in an airtight container in the refrigerator.
Notes
Loved this recipe? Save it to your favorite Pinterest board so you can easily find it later! ✨